The print embellishment of Foiling is a non-ink-based process. It adheres a micro-thin metal ‘foil’ onto a sheet of paper or board. Thus creating a very different aesthetic from metallic ink or toner—with a ‘true’ metal look. There are several methods of Foiling, GSM takes a look…
Hot Stamp Foil
Hot Stamp Foiling is similar to embossing/debossing but only uses a single (male) block—there is no female block. The block is heated and hits the foil material onto the substrate. This heat and impact pressure fuse the foil to the substrate surface. Note that the impact leaves a very slight deboss effect, usually only visible on the foiled side.
Combination Foil
Combination Foiling is similar to Hot Stamp Foil but with a female block added. This results in simultaneous foiling and embossing. It is important to note that when using Combination Foiling, everything embossed is also foiled. This means that you can not have Foil or Embossing in separate places on the design. This would need to be two separate processes.
Cold Foil
Cold Foiling is an entirely different process from Hot Stamp, but the finished result looks very similar. It uses adhesive transferred by a printing plate to the substrate, against which the foil is applied. This process is undertaken in-line as part of the print run on some lithographic and flexographic presses (particularly presses used for packaging or producing labelling for products such as wine). There is no block or stamping involved. Cold Foiling is an efficient, cost-effective way to add foil to large print runs. Just note that some papers and boards, particularly heavily textured grades, are not suited to this process.
Digital Foil
‘Digital’ foiling is also a completely different process, but the results look similar to the others. A specialised foiling machine (separate from the digital printer) uses heat to fuse foil to areas of printed toner on the substrate. There is no block or stamping involved. The process is quick, easy and relatively cost-effective for foiling short print runs, but it is generally unsuitable for large print volumes due to the manual labour involved. Digital foiling can also make use of variable data, allowing customisation of each impression—great for projects that require personalisation, such as changing guest names on wedding invitations.
Digital Foil Example:
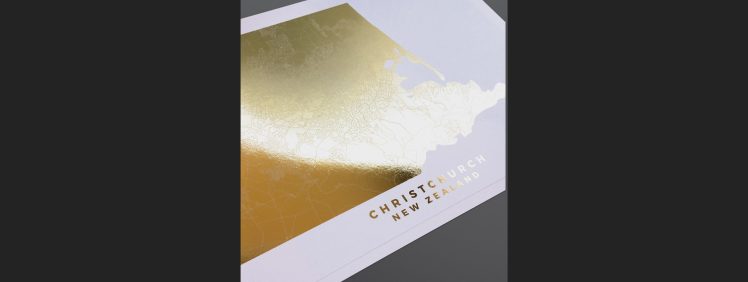
 This striking limited-run wall print uses digital foil. We printed the image area first (in plain Key-Black toner on a laser-based system), and then fed the sheets through a digital foiling machine, adhering the gold to the toner. The finished look is very similar to Cold Foiling. With digital foiling, it is important to note that the foil may not adhere particularly well to some textured stocks. Also, fine detail can cause problems if there is not enough toner for the foil to adhere to. A good idea to avoid these problems is to run a test print before committing to the entire run. Artwork set up is also very important for digital foiling, so check with the printer to see how they want this supplied.
Foil Colours
Subject to the specific foiling process, many foil colour and finish options are available—including metallics (golds, silvers, bronzes, plus metallic colours), black and white, non-metallic pigments, transparent and holographic foils. Note that digital foiling is limited (although this will likely change as demand increases).
If you are thinking of using foiling on a project—early in the process, ask your printer what they have available or can order in.
Business Card Example:
This business card example, produced on black stock, uses Combination (gold) plus Hot Stamp Foiling (silver)—there is no printed ink on this design.
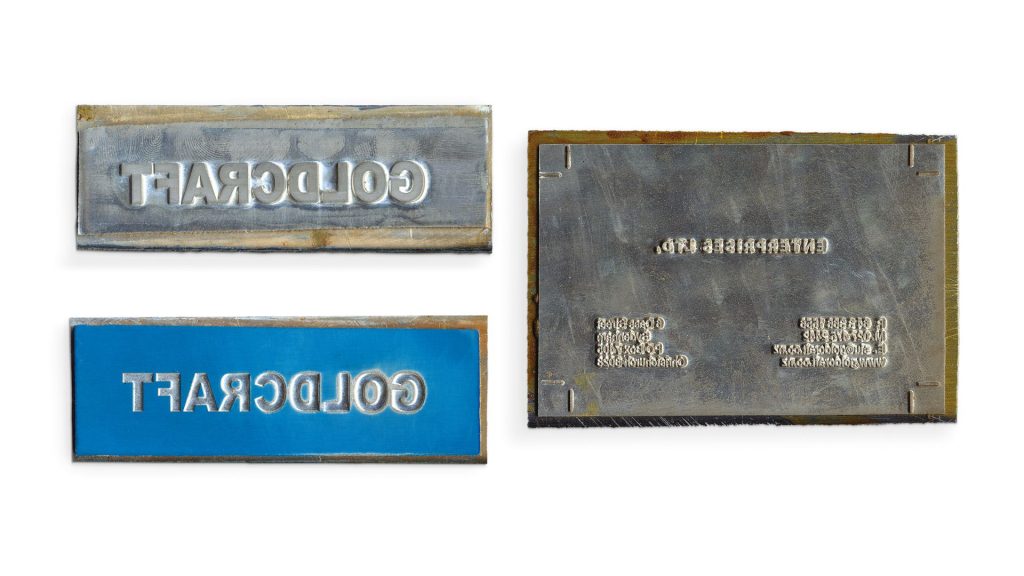 On the left you can see the two blocks used for the Combination Foiling—the raised areas on the male block strike the foil against the card pressing this into the recessed areas of the female block, thus applying the foil and creating the emboss simultaneously. You can also clearly see the negative impression left on the reverse side of the card. The third block is the male block used for the Hot Stamp Foiling. The raised area strikes the foil onto the card without pushing the stock into a recessed female block—hence, no emboss. Note these blocks are wrong reading; the resulting impression transposes this to be right reading.
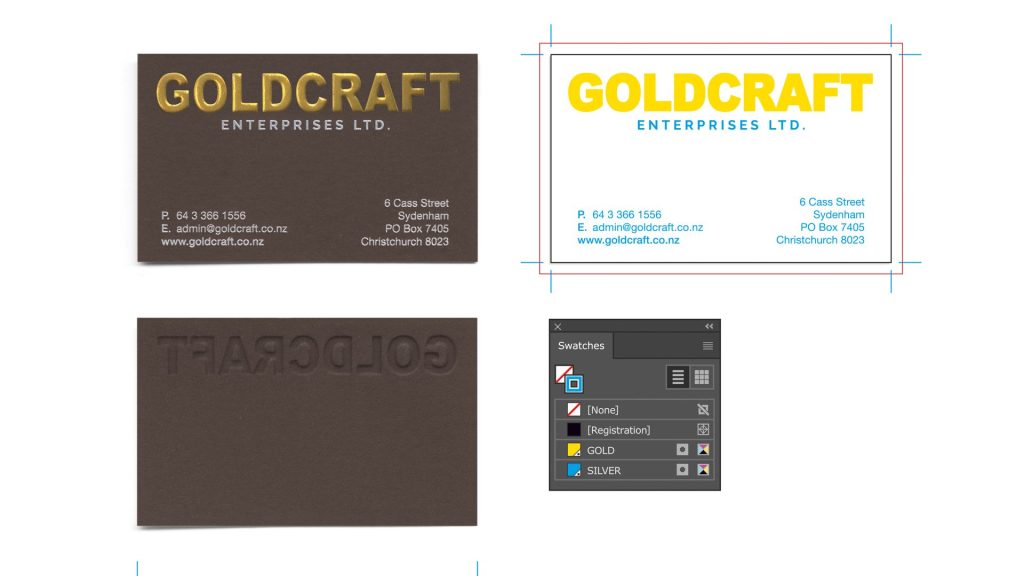 On the right is the artwork for this project. Created in Adobe Illustrator, this artwork file uses two ‘Spot’ colours (as indicated by the little dot in the colour box circled in magenta). Yellow represents Gold, cyan represents silver. The on screen colours make no difference to the final result, as the die-maker is only using this drawing to make the blocks.
This article was originally published in GSM-CMYK. To read this and other great articles purchase this issue here.