
GSM takes a look at how cardboard packaging formes are designed and prototyped. Plus die-making and how stamping is done…
 Cardboard packaging is everywhere and in a time when we are becoming increasingly aware of the need for sustainability carton board is an unsung hero. Recyclable, renewable and bio-degradable, pretty much everything plastic isn’t.
Designing formes and constructing packaging using cardboard is a real skill. Even at it’s most basic, cardboard packaging is very complex. Developing a packaging forme often requires significant time in prototyping to ensure it constructs correctly. Once the forme is proven to work, the operator makes a steel rule die (sometimes referred to as a knife). This die ‘stamps’ the shape out of the board stock. The best way to store the finished cut formes is usually to store them flat, ready for assembly as required.
In this article we take a look at the following three steps:
- Forme design & prototyping
- Die-making
- Stamping
Forme Design & prototyping
Creating complex three-dimensional cardboard constructs requires the ability to think in three-dimensions and to also understand cardboard as a material. For this reason, we use packaging specialists to design formes.

A packaging specialist uses CAD based software or Adobe Illustrator to design concept formes. They then test and refine the formes by creating prototypes using a contour cutter.

The contour cutter cuts the outer shape but can not crease folds. The operator must add these manually with a creasing tool.

They then checks the prototype to ensure it constructs correctly.

They often make a final prototype using the actual stock chosen for the final package, just to ensure it performs as it should.
Cardboard for Packaging
This brings us to cardboard. Not all stocks perform equally. Choosing the correct stock for the intended purpose is crucial. Considerations include:
- Strength & sturdiness: Ensuring the stock is strong enough to hold and protect the product—both in transit and on the shelf.
- Moisture resistance: This is particularly important in packaging for chilled or frozen products. For example, beverages such as beer boxes and frozen foods. Board that is not moisture resistant will quickly become compromised and fall apart.
- Grease resistance: Critical for hot or fried foods, as the stock will repel the grease to ensure the packaging maintains it’s integrity.
- Suitability for food products: If packaging comes in direct contact with food, the stock needs to be ‘food safe’ (FDA approved) so it does not taint the flavour of the product.
- Grain direction: This is important for complex packaging constructs for both strength and stiffness. Grain direction is also important for cosmetic reasons, as some coated board stocks can crack if folded against the grain.
- Available sheet sizes: Sheet size is important for economy. If the sheet size is not large enough to fit the forme, we will need to stamp the forme out in two separate halves. This involves two dies instead of one, and will require gluing. This all adds to the cost of the project.
- Printability: Some board stocks have much better printability and surface quality than others. This is an especially important consideration for retail products.
Die-making
Once the forme is good to go—a specialist die-maker makes the die. Die-making is a labour intensive process with a significant amount of the job done by hand.
The first step in the process is to channel-cut the forme into a sheet of plywood. This creates the die base. In the past, we used a jigsaw to do this work (…not a quick process…), but today we usually use a router or laser. This greatly speeds things up. The downside is the cost of these machines. They can range anywhere between $150,000—$750,000.
To withstand the rigours of the stamping process, the die base, made from plywood, needs to be at least 16mm thick. This is, however, problematic as the precision router, that cuts narrow channels for the blades, has difficulty cutting through this thickness of plywood.

To get around this, we cut two mirrored ‘male’ and ‘female’ bases from 8 or 9mm plywood

and glue them together to create the necessary thickness.

We then place the glued base in a vacuum to dry and set.

Once the glue on the die base sets we cut the knife blades to length. The operator then bends the blades to shape using a bender machine. Note, we make different types of blades for cutting, perforating and scoring folds (fold blades have a blunt, rounded non-cutting edge).


The operator then inserts the blades into the corresponding channel on the die-block using a mallet.

The finished die is now ready for dispatch to the packaging specialist/printer, who is doing the stamping. Just note, the above die is not the same die as per the die-making photos. This example is a ‘four-up’ die. This means it will stamp four separate box formes at once. This improves efficiency and maximises the use of the board stock by reducing the amount of waste.
Stamping / Die-cutting
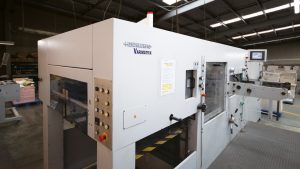 At the packaging house or printer, the die block is loaded onto a stamping machine such as this Heidelberg Varimatrix. This machine can cut up to 7,500 sheets per hour and can stamp solid cardboard up to 1400gsm weight, or corrugated board up to 4mm thick.
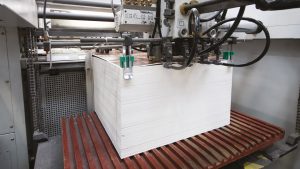 The operator stacks the pre-printed stock onto a loading tray which feeds it through the machine. It runs past the die which stamps the forme.
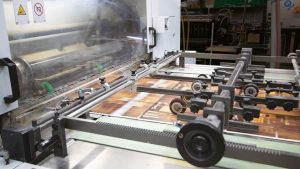 The machine then feeds the stamped stock out the other end onto another loading tray ready for collection.
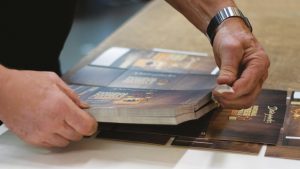 The operator removes the waste by hand, glues the trimmed packaging at the join/s and delivers it flat to the client/product manufacturer for assembly. The final step in this process is for the printer to collect and recycle the off-cut waste.
GSM would like to extend our thanks to the teams at both Custom Cutting Formes (Christchurch) and Pakworld (Christchurch) for assisting us with this article. Thanks guys!
Photos by Xavier Murphy @xalacreative
One Comment on “The Skill of Designing Cardboard Packaging”
Comments are closed.